
Randomly generating 3D mazes to 3D print
01 July 2020I recently got a 3D printer for home prototyping. One thing I wanted to make was a puzzle that took advantage of the strengths of 3D printing. I didn’t really find anything I liked on Thingiverse so I decided to write a program to randomly generate 3D mazes.
Randomly generating a maze
Mazes can be represented as a discrete set of vertices and edges, i.e. a graph. Imagine a grid of squares, where some of the sides of the squares are missing. Each square is represented by a vertex, and a missing side of a square is represented by an edge. To randomly generate a maze, we can start with a set of vertices with no edges, or a grid of squares with no breaks. The number of vertices is determined by how big we want the graph to be. Then, we add edges, or “breaks,” to the vertices until the maze is complete.
The resulting graph representing a classical maze has a few properties. It is connected, meaning there is a path connecting any two vertices, i.e. no vertices are isolated from each other. The graph is also a tree, meaning it has no loops (trees are also connected). I.e. for any two vertices, there is only 1 path between them. While mazes can have loops, it is something you can easily add afterwards by randomly adding edges, so I will ignore loops.
There are multiple algorithms that can randomly generate trees on a set of vertices. I decided to use Prim’s algorithm because it has a defined starting point. So it may generate mazes that are easier to solve in reverse, thus providing a hint to the person trying to solve it. 3D Mazes can get pretty hard.
My program
I wrote a Python program that uses randomized Prim’s algorithm to generate a graph that represents a 3D maze. It is similar to a grid a squares with “breaks” in it, except it is cubes instead of squares. The graph is passed to a set of functions that output openscad based on the graph nodes and how many walls they had broken.
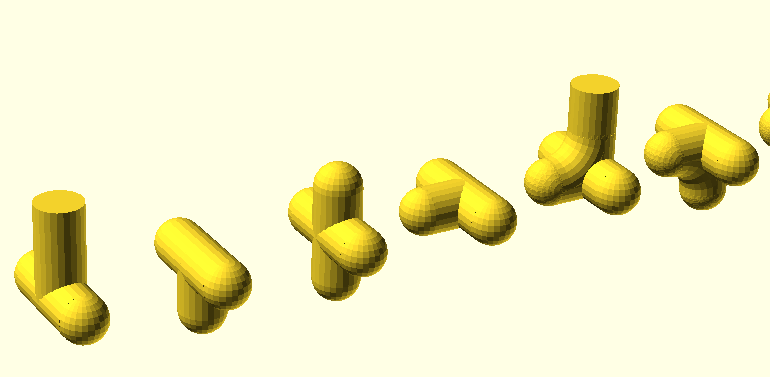
Below are some building blocks that get used to build the 3D maze based on each vertex in the graph and how many edges/walls it has.
Here is an example 5x5 maze.
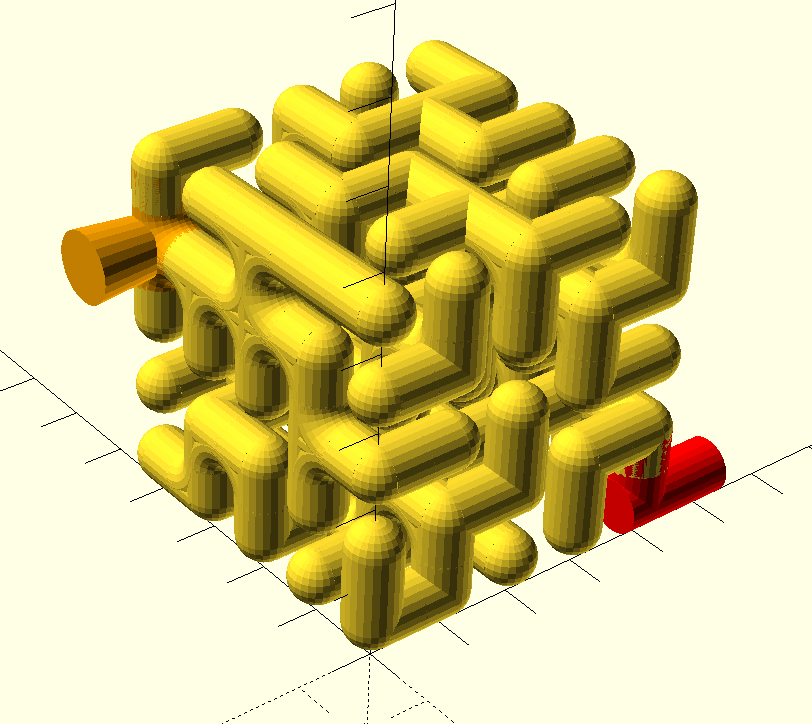
The start is marked in orange and the exit is marked in red. The exit is chosen by finding the node that is furthest from the start while still being on an outside face. Ideally, the exit is one of the leaves of the tree.
3D Printing
To 3D print this, you need to make the paths cut out of something else. I added a couple options to my program. You can subtract the maze tunnels from a large cube, making a solid where you cannot see the paths inside. Or you can subtract a scaled down version of the maze from itself so it hollows out the tunnels, pictured below.
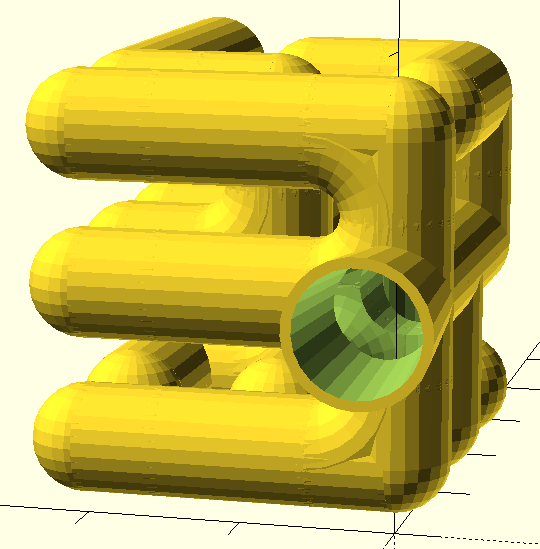
I decided this looked the coolest. And because it is a mesh of tunnels, it would be hard to fabricate by conventional means. No problem for 3D printing! The largest challenge at this point is the time it takes to print. The model itself will take on the order of hours to render on openscad. Printing could take on the order of days to print, especially if you include support material. Then it could take awhile to remove support materials.
I first tried going small, printing a simple 3x3 maze.

With PVA support material, it took about six hours to print and a few days to fully dissolve away the PVA with a bowl of water.
I decided to make one improvement by slicing small holes in all nodes of the maze, so all the internal PVA supports dissolve much quicker.
Here is a 7x7 version with PVA supports. It is about 70mm cubed.
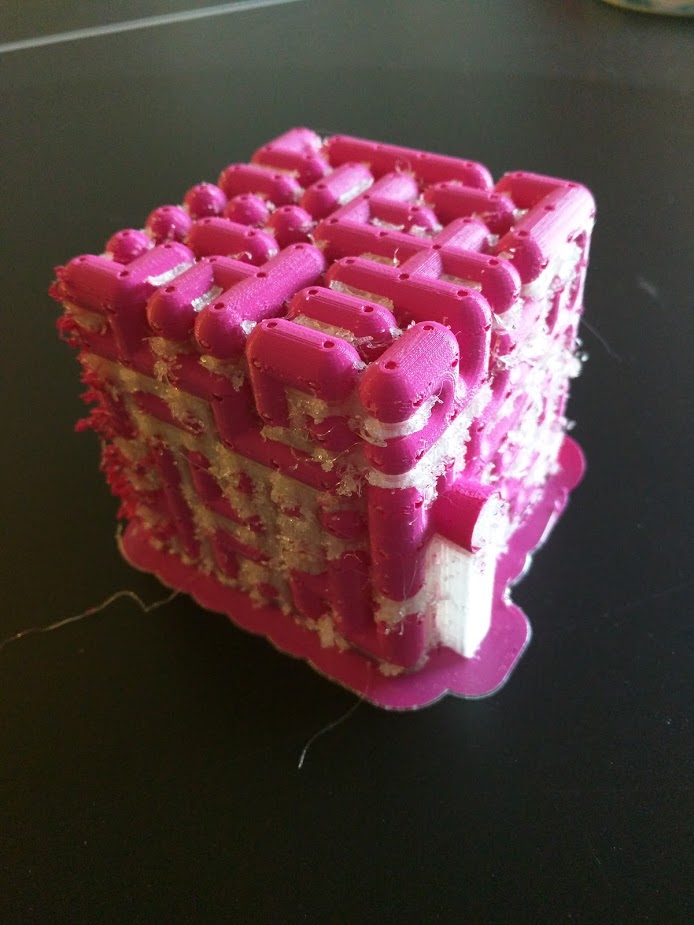
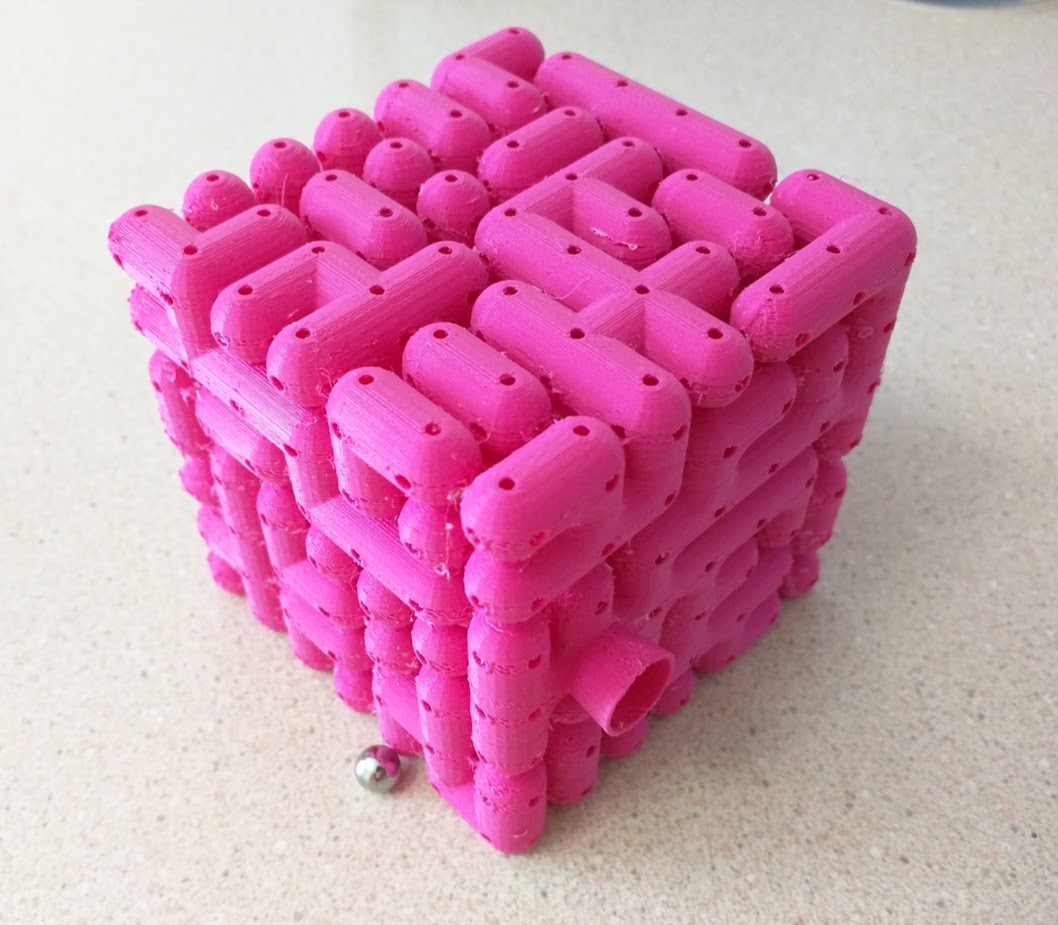
It took just over 3 days to print. It took another two days to dissolve the PVA. The small cutouts turned out to be pretty effective at getting rid of the internal PVA supports.
I got a small ball bearing to test out playing it. It is a little difficult to navigate as the ball falls past paths quickly. I haven’t solved it yet and I’m not sure how much playing in reverse helps. 7x7 might be a little extreme.
I should have added a solution output to my program.
Wrap up
As usual, my program is on Github. If you try it out, let me know if you have any success.